Since my first self watering pot did so well, I decided to try it again with a few more pots. See our blog from Monday, September 11th for more details on how to make a self watering pot.
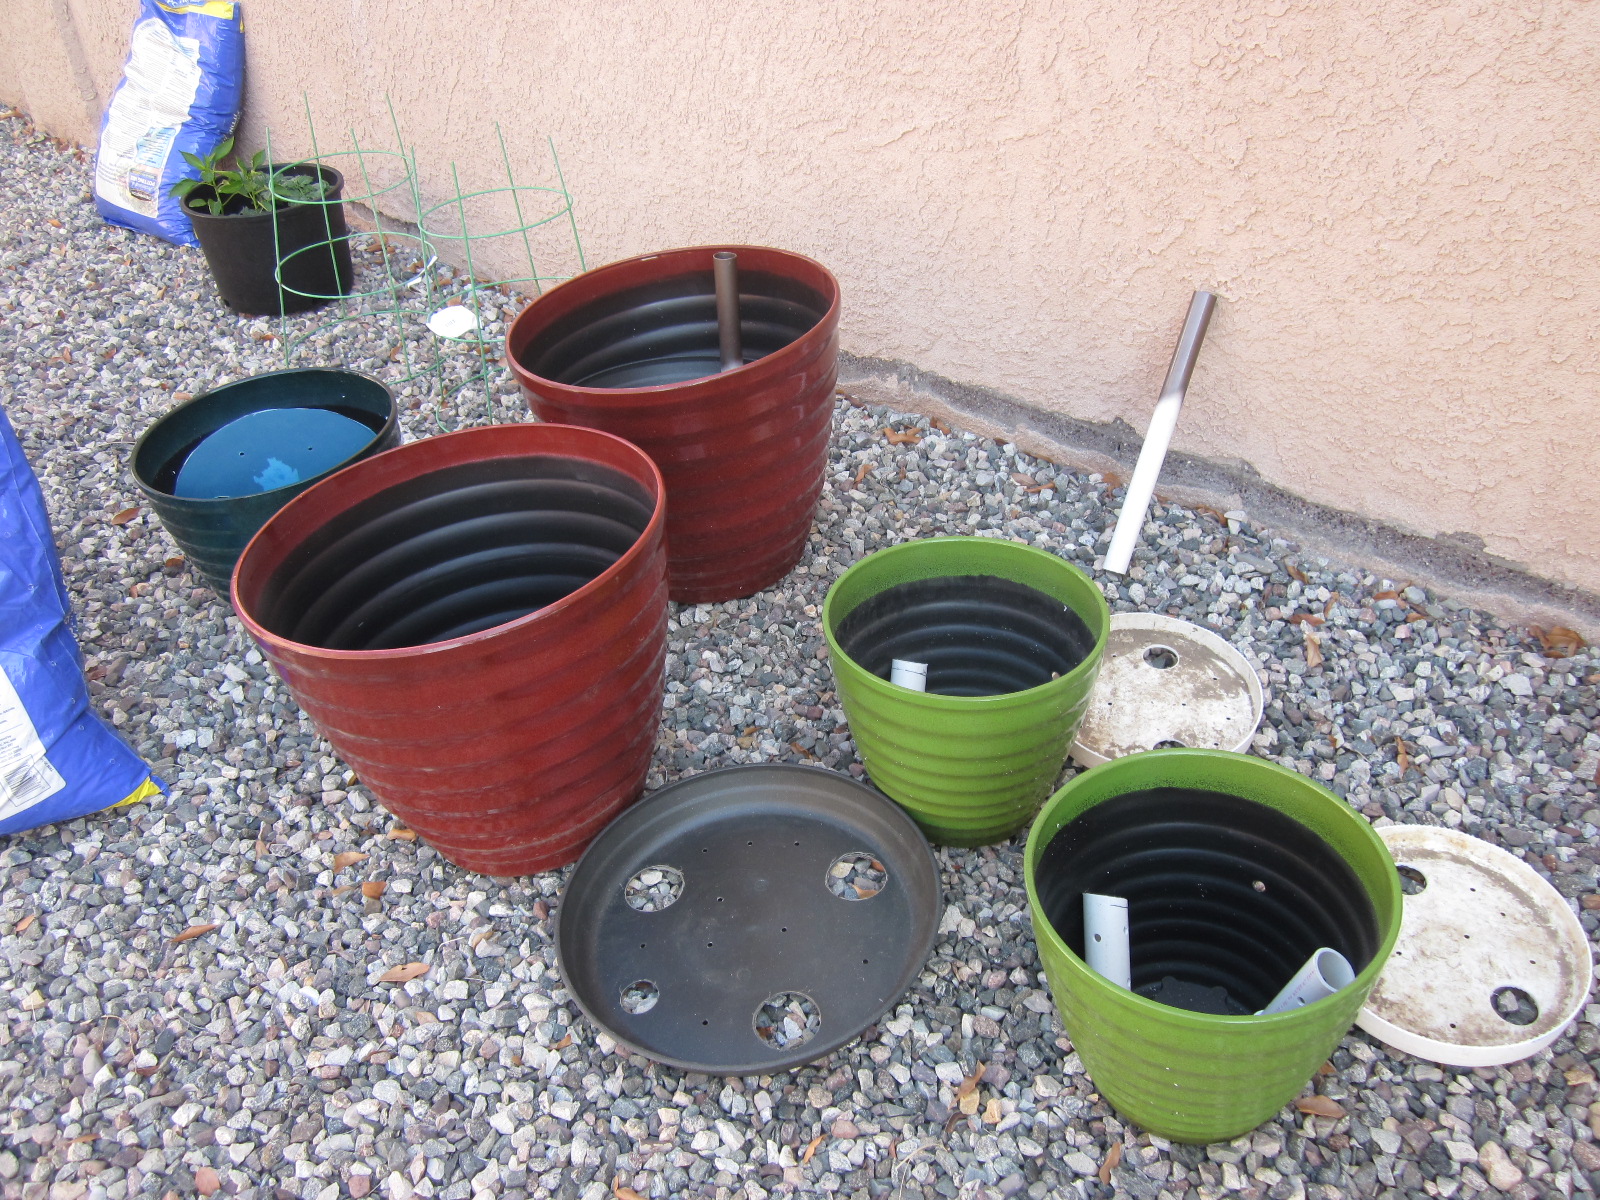
We did these using the exact same concept as the last pot, but this time we tried to make it easier on our selves. We bought pot bottoms to use as the soil base and used PVC instead of water bottles for the wicking tubes. It made it so much easier, and hopefully will work just as well.
This is one of the pot bottoms. We marked where we would need to drill it out. The X's are where we will put wicking tubes, and the O is where we will put a fill tube. Since this is such a big pot, we decided it would be easier to fill it through a fill tube. We have already cut one of the wicking tube holes.
Making the wicking tubes. PVC pipe with end caps, cut to length. Then drill lots of holes in it for the water to get in to the potting mix.
Here is our soil platform and our wicking tubes.
And here it is all set up. Now we just need to make our fill tube. We measured how long the fill tube would need to be. It will need to come just to the top of the pot once we cut it to length. We are using smaller PVC pipe for the fill tube.
We did this for five more pots in total, making the base for the soil, and all of the wicking tubes. You can see the two fill tubes leaning against the wall in the background. They are for the two large red pots. We painted the top of them so they wouldn't stand out so much once the pots are set up.
With all of the components done, we are ready to start filling our pots with dirt.
The potting mix for the wicking tubes needs to be really wet, so we used this 5 gallon bucket to mix the potting mix and water.
Then we filled the wicking tubes, one at a time.
We put the wicking tubes into the pot with the soil base already in there. The bottom of the pot below the soil base will hold water. The wicking tubes will absorb water and wick it up to the soil above the base.
Once the wicking tubes and watering tube are in place, we began adding wet potting mix to the top.
And then, we got to plant our vegetables!
This particular pot will hold about 2 1/2 gallons of water in the base. The smaller pots hold less.
We went through the same steps for the four remaining pots. Each was a little different, but all built using the same concept. The smaller pots do not have watering tubes. I just water them through their overflow hole.
We loved the finished product! My Arizona garden. I am so excited to see what I get to harvest throughout the winter!
Then I took a few minutes to plant some marigold seeds to help keep the pests out of my veggies.
Thank you honey for helping me create my beautiful Arizona garden! It's the little things in life that make me happy! I love it!
We've talked before about some of the great produce we can get in this town, and today we have another great find. The world's largest mango.
This is a large avocado, the mango and a large spaghetti squash for comparison.
We'll have to wait to peel it until we are really hungry. It's huge!
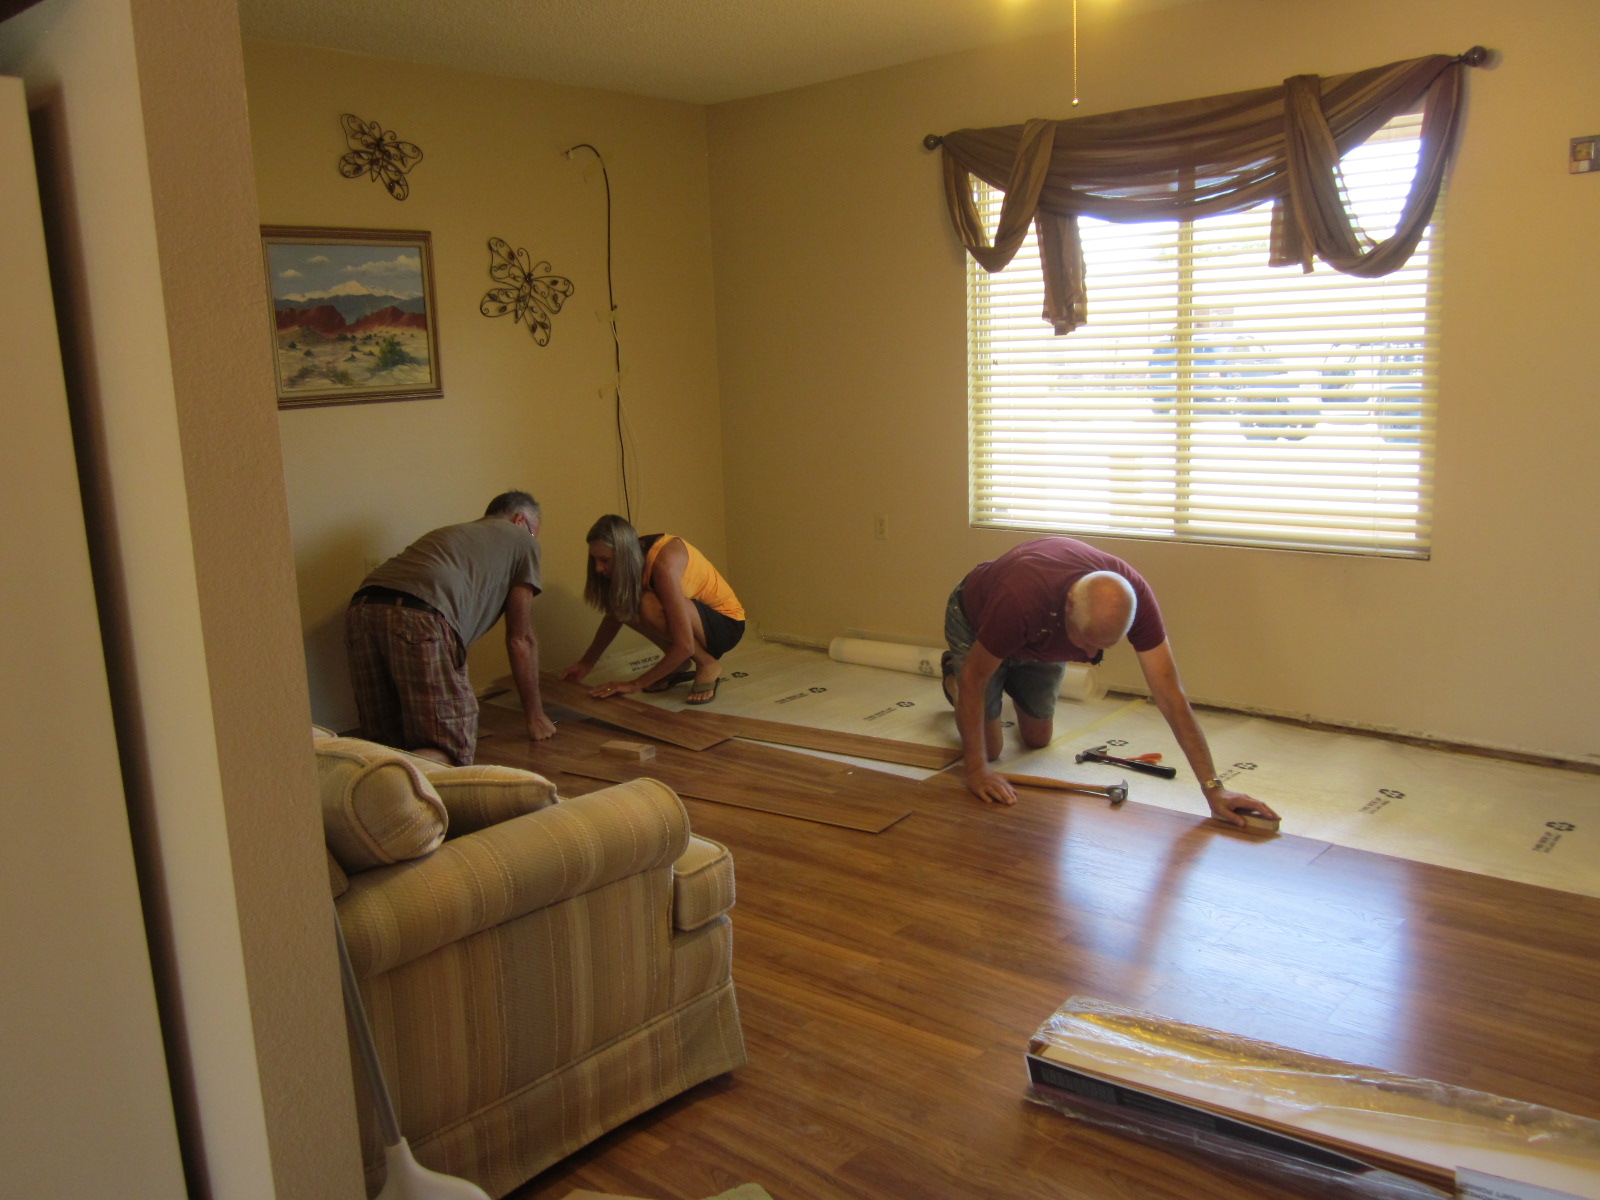
We headed to Phoenix this weekend to help my parents install some new laminate floors. They had tile in their kitchen and laundry room, but the rest of the house was carpeted. They wanted to get rid of the carpet and replace it with something cleaner and more functional. They settled on laminate floors. They chose a color called Ashville Hickory, which I thought was beautiful.
We started in their bedroom and followed the directions for laying laminate. You have to use an underlayment on concrete to prevent moisture from getting to the laminate. Then you measure the room to make sure that you won't end up with little pieces in either direction. You then stagger the planks to get a hardwood floor look.
We worked from left to right, and it snapped into place very easily. The men could just snap it into place (using their brute force), but I had to tap it into place with a rubber mallet.
In addition to the flooring, they decided to replace the baseboard trim with new stained trim, so my mom and I conditioned and stained the trim while the men were tearing out the carpeting and cleaning he first floor.
We set up a saw in the garage for cutting the laminate. They make laminate cutters which reduce the saw dust, but the saw worked fine as well.
Once the trim was stained, we all just jumped in laying the laminate.
The main part of the floor goes very quickly, but all of the extra cuts for the closets and around doors take a lot more time.
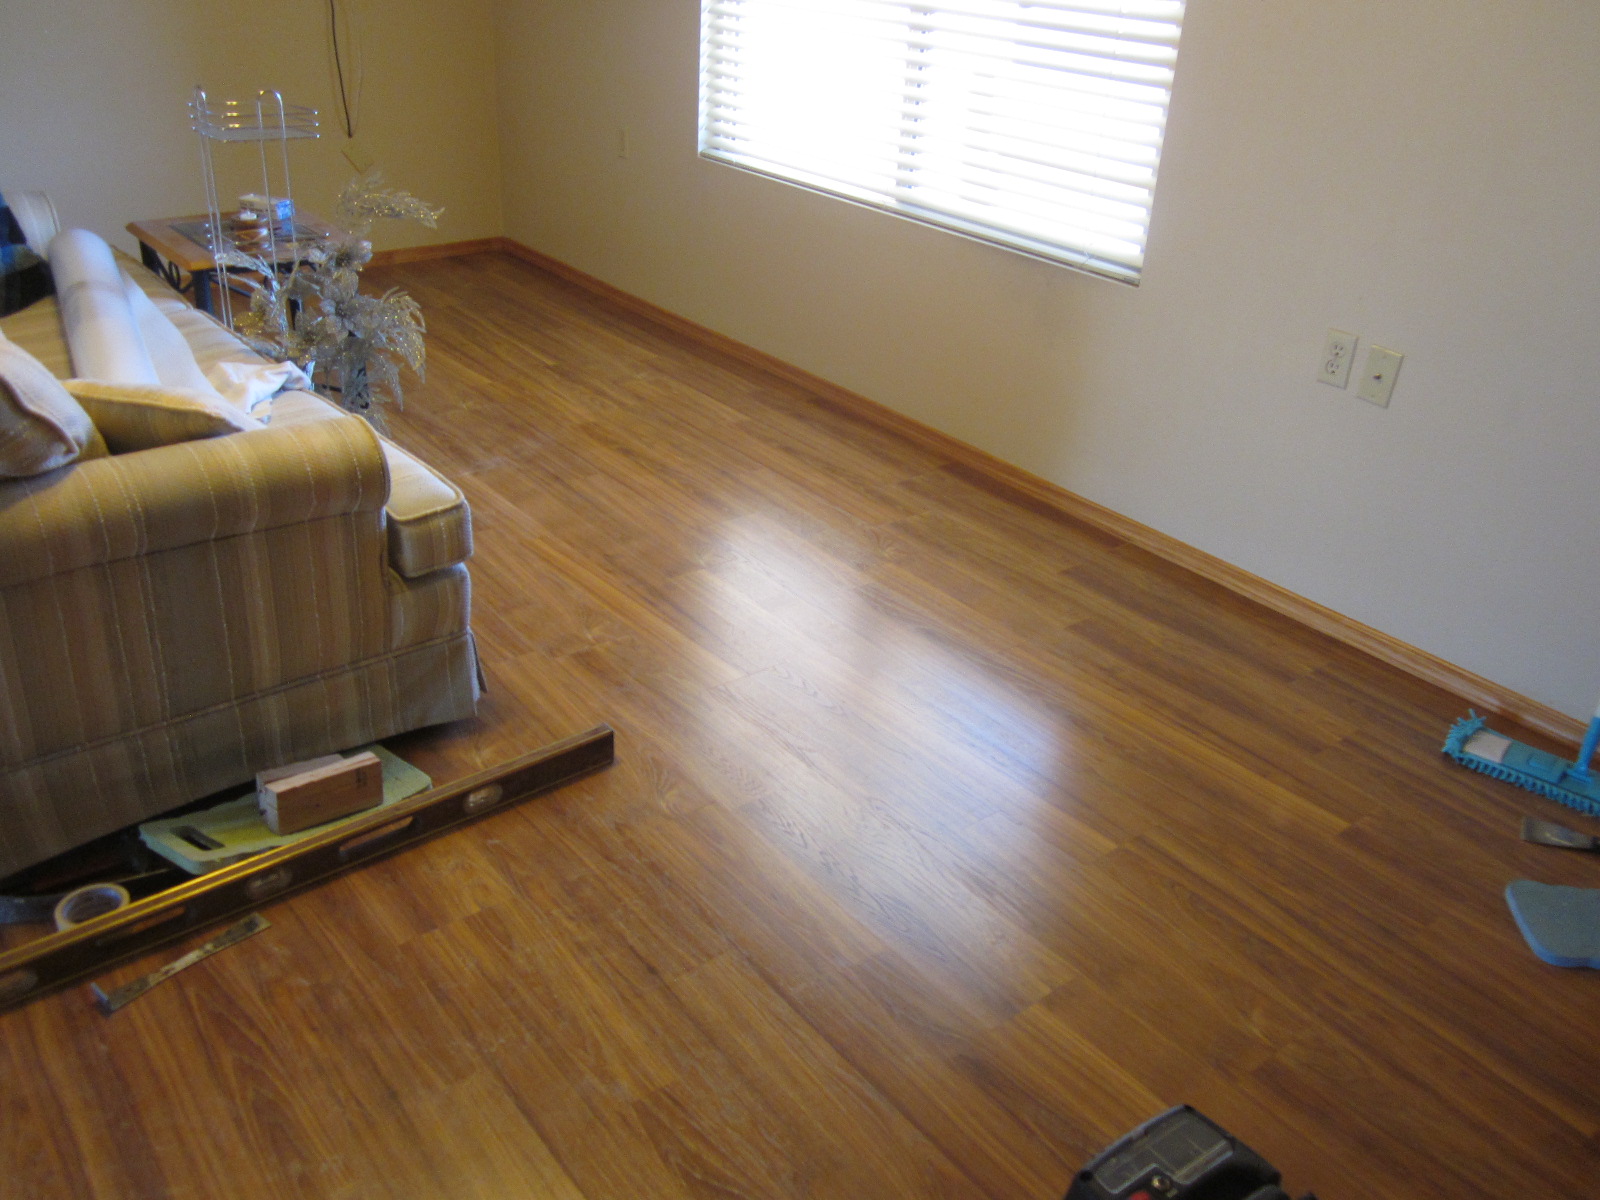
My parents room is almost done. You can see that there is still carpet in the hall. We had to work around furniture, so we did one room at a time, moving furniture before we started on each room.
Once the floor was done in their room, Steve and I started on the base board trim. We wanted to finish all of the trim before we moved the furniture back into each room so it wouldn't have to be moved again.
Once my parents room was completely done, we moved on to the hall and living room. We pulled up the carpet, pad tack strips and base boards, then scraped the concrete to make sure all of the carpet glue was gone and it was nice and flat.
Since we really din't have anywhere to move furniture to, we did the living room in two halves, completing the first half and then moving the furniture over there so that we could complete the second half.
Once again, we started in the left hand corner, this time in the hall. The first piece was a bugger since we had to cut it to fit two door frames.
Once the first half was done, we moved the furniture out of the second half so we could tear up the carpet, pad, tack strips, and base boards and start scraping again.
Then back to laying the laminate again.
Then back to installing the baseboard trim again. Steve and I would measure and cut each piece and my dad would nail it in place.
Last but not least was the spare bedroom. By the time we got to this room, we were finally getting the hang of it.
It was a dusty mess while we were working, but my mom would continually sweep up our mess to try and keep the dust down a bit.
Once we were all done with the installation, I went back through the house and cleaned all of the floors with a damp cloth. It seemed like the only way to pick up all of the fine sawdust.
 |
| The spare bedroom |
 |
| My parents room |
 |
| The hallway transition |
 |
| The living room |
We had one little unexpected project while we were there. In order to put laminate in the closets, we had to take out the old closet doors and tracks, but unfortunately when we did that, they fell apart and were ruined. So with a quick trip to Home Depot, we were able to get new closet doors and install them too.
The house is clean, the furniture is all moved back in, and my parents have beautiful new laminate floors. All they will need to do is paint the new closet doors at some point, but there is no hurry on that.
They seem happy with their new floors. We are so glad! It took us five days of hard work, but it was definitely worth it.
A quick side note...While we were helping with my parents floors, we stayed at the Sleep Inn on Southern Avenue in Mesa, AZ. It was a great little hotel with clean, well laid out rooms, a hot breakfast waiting for us each morning, and hot cookies every afternoon. We would definitely stay there again.
We have had a huge summer of boating, golfing and RZR riding in the Hualapai Mountains, but now the weather is starting to cool off, which means time to get some more projects done.
My sewing machine is in the garage because we don't have room for it in the house, so sewing during the summer is out of the question. But now that temperatures are below 100 (at least most days) I have pulled it out again. This time I am going to make a cover for an outdoor dining set we have. This should be fun!
I bought five yards of off brand Sunbrella fabric for just over $25. It's much cheaper than the real Sunbrella, so that was nice, but we'll have to see how it holds up to the hot Arizona sun. And as you can see, a ping pong table makes a great table for large sewing projects.
It was kind of an unwieldy project once it got under way. I really didn't know what I was doing. I was just kind of planning it as I went.
My machine had no problem sewing through multiple layers of the outdoor fabric.
I decided to add zippers to two of the sides to make it easier to get on and off.
It will go on this outdoor dining set, which seats six comfortably, or 10 with four people on ottomans instead of chairs.

And then it all folds up under the table to form a big cube.
It's a great dining set for a small space, or for an area where you need to be able to protect it a little bit.
When I finished my cover, I tried it on the table. It fit perfectly! In the next picture I have the zipper open with one side flipped up.
And now it's all zipped down and in place. I'm very happy with the way it turned out. It will protect our table and chairs from the brutal Arizona sun, and adds some color to our patio.
When we want to use the table, we can either take it off and enjoy the whole table, or for just Steve and I, we can just flip a side back and pull out a couple of chairs without having to remove the whole cover. My little lizard holds it on in case of high wind.
This was a really fun project and gave me a chance to try my sewing machine on a heavier fabric. It worked like a charm. I am really impressed with what it will sew through!


